
The following instructions will help you make a Matchbox Gift Card Holder. You can purchase a range of gift card holder designs in my shop.
You don’t need any special equipment to make these, just some basic craft supplies.
The video below shows me making this Matchbox Gift Card Holder. Just press play.
Materials Required
- Scissors
- Ruler
- Double-sided tape
- Empty pen (for scoring)
- Craft Knife
- White card (250gsm)
- Colour printer
PIN THIS POST FOR LATER!

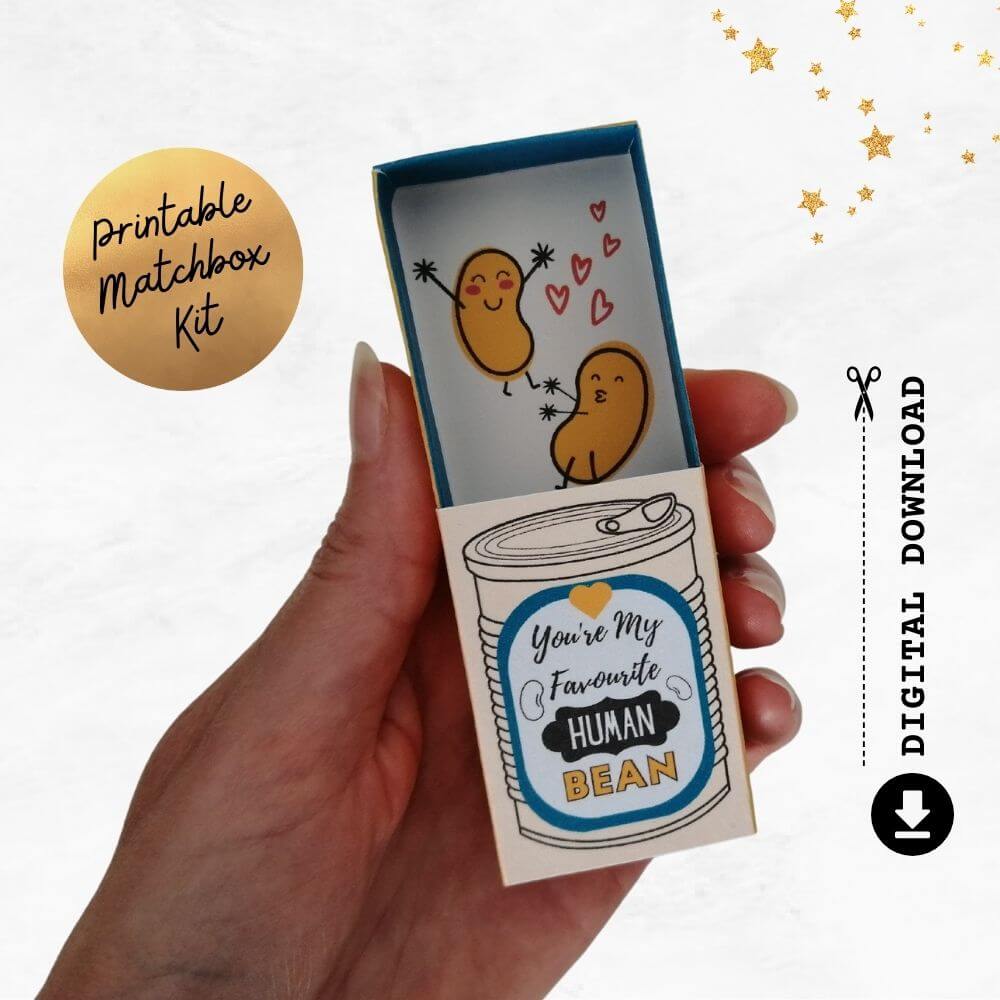
A Matchbox Gift Card Holder makes a great last-minute gift that doesn’t look like it’s been thrown together in a couple of minutes! Just download, print, assemble and add a gift card. You could even add cash. Another way to use them is to omit the gift card section and just use them as a matchbox and add small gifts like jewellery or chocolates. They are very versatile, not to mention so stinking cute!

1. Print The File
I used a basic Canon Inkjet to print my Matchbox Gift Card Holder and the quality came out great. The colours of your finished product will vary depending on your printer, inks, paper type etc.

Select ‘high quality’ in your printer settings for the best results. In mine, you can see that the quality details are in ‘more properties’ in the printer settings.

Print on good quality, thick, card stock. I used 250gsm and found this to be the perfect thickness for a sturdy finish. Originally, I did try 220gsm card (I used this for my mini matchboxes and it was great) but I found that it was too thin for this Matchbox Gift Card Holder project and it didn’t work properly. If you don’t have white card, you could try printing it onto normal copy paper and sticking it onto something like cereal box packaging or similar (though I haven’t tested this!). If you want the best result I recommend going for 250gsm card. You will need to check that your printer can handle this thickness of card but I have found that even my £50 printer is up to the job!

2. Cut Out The Components
Nothing fancy is needed here just a pair of scissors and a bit of patience. Take your time, it’ll be worth it!

When cutting the inside drawer and the gift card holder sections, make cuts right up to the edge of the middle bit on the 4 short sides (see the circle photo below).

3. Score The Outside Wrap
Get your score tool ready, i.e. the empty pen! Just make sure it really is empty first by giving a quick scribble on some scrap paper! Using a ruler, apply a good amount of pressure with the empty pen to score. This will make it so much easier to fold and provide neater edges. Then gently fold.

4. Apply Double Sided Tape
Apply a few strips of double-sided tape to the outer plain flap on the outside wrap. Carefully fix together.

5. Score The Inside Drawer
Firmly score the inside drawer with the empty pen. Then fold.

6. Apply Double-Sided Tape To The Inside Drawer
Apply 6 pieces of double-sided tape to the inside drawer as shown below (one on the outer longer edges and 2 on the narrow edges). Start folding at the narrow ends by tucking in the tabs and folding the flap down. Repeat with the other narrow edge and then fold the 2 longer flaps down to finish.

7. Assemble The Card Holder
First, score the card holder as per the instructions above. Then carefully fold. Using a craft knife VERY CAREFULLY follow the oval guideline to cut into the card. This is where your gift card will sit. Next, tuck the flaps in on the gift holder to provide a nice neat insert that will go inside the inside drawer. But not yet…

8. Assemble The Components
Score the inner page. Just one line here so this is quick and easy. Now it’s time to assemble all the components. First place the inner page/flap over the card holder. If you have 2 inner flaps (see below) then place one at each end. Place these into the inner drawer. You won’t need any glue as this will be a nice snug fit.
Tada – all finished! Well done!

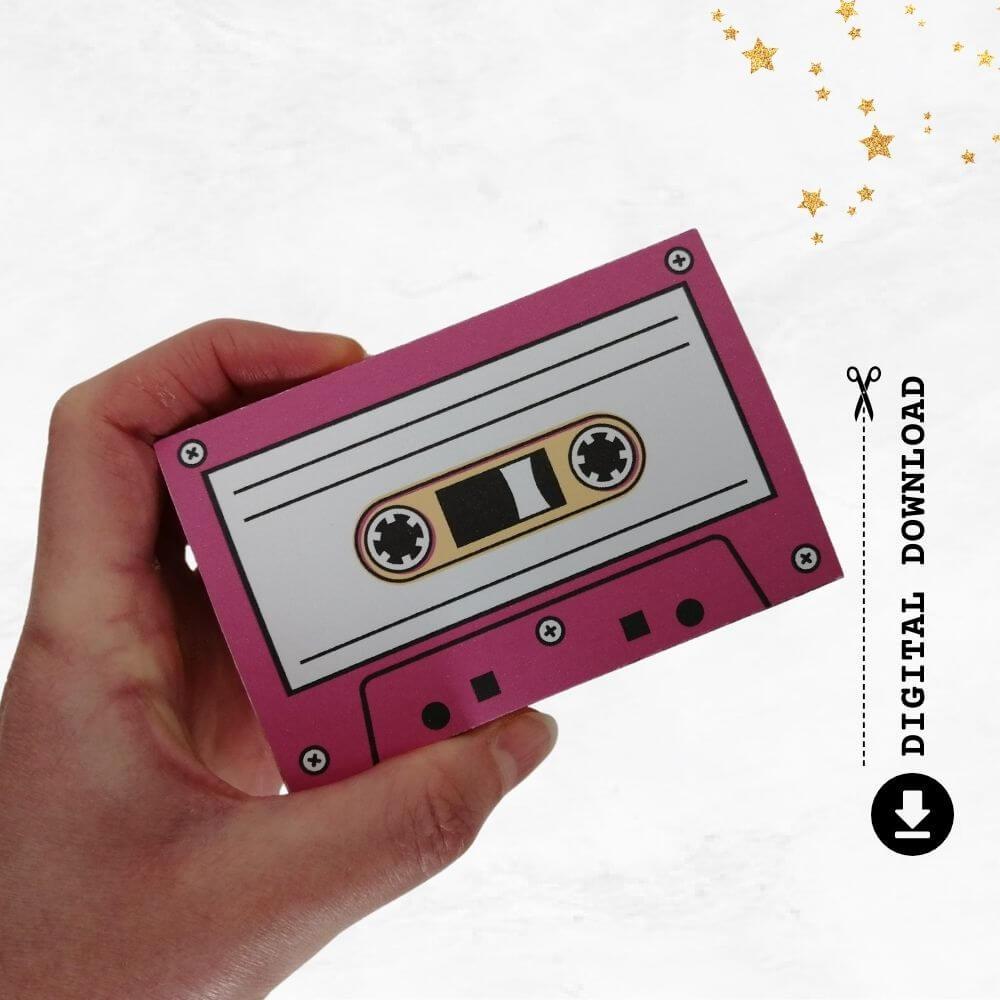
8a. For a Landscape Matchbox Gift Card Holder / 2 Inner Pages
The above instructions are the same for landscape boxes like the cassette box below.

If the Matchbox Gift Card Holder box has 2 inner flaps, assemble them in the same way, just place a flap at each side of the gift card holder.

9. Just Add a Gift Card
You’ve made a cute Matchbox Gift Card Holder! Yay! Now all that’s left to do is pop in a gift card and give it to someone special.

Other Ways To Use Your Matchbox
If you love the idea of giving someone a cute little matchbox but don’t want to give them a gift card, just make the outside wrap and the inside drawer. Then pop in little gifts like chocolate, jewellery or even cute little letters.
With all the different designs you’ll be able to find one that will suit that special someone.

